RECIPE: Raisin Hokkaido Milk Bread by Jenn Chan

Raisin+Hokkaido+Milk+Bread

I’m so excited to be writing yet another recipe! This one, I am very happy with sharing since so many of you have asked me for the recipe! Once you have mastered making the Hokkaido Milk Bread, you can really just put any ingredients in there! (PS. if i can make this, you most certainly can!) In this recipe, I have chosen to put in some raisins! I remember loving buying a Raisin loaf from T&T and snacking on it throughout the day on the couch straight from the bag!

* I’ve linked some of my fave tools with this post *


WHAT IS HOKKAIDO MILK BREAD?

Hokkaido Milk Bread is super easy to make (easier than sourdough), amazingly light and fluffy, and easily pulls apart. It uses a Tang Zhong Roux which helps to create a soft tender loaf of bread. You’ll want to make the Tang Zhong Roux ahead of time though as you’ll want to use it at room temperature.

TIP: I would suggest making it the night before and leaving in the fridge for your use the next day!

TIP: I like using a scale for measurements as I find it’s more accurate!


RAISIN HOKKAIDO MILK BREAD

INGREDIENTS

Tang Zhong Roux (make ahead)

  • 35g (1⁄4 cup) Bread Flour

  • 175g (​3⁄4 cup) Water

Milk Bread

  • 340g (about 2 & 2⁄3 cup) Bread Flour

  • 3g (½ teaspoon) Salt

  • 30g (2 tablespoons) Sugar

  • 5g (1 & 1⁄4 teaspoon) Active Dry Yeast

  • 40g (a little less than 1 medium sized) Egg - keep leftover egg for brushing after!

  • 140g (½ cup + 1 tablespoon) lukewarm Whole Milk

  • 155g Tang Zhong Roux

  • 40g (3 tablespoons) Unsalted Butter (cubed & softened at Room Temperature)

  • 1 or 2 cups (depending on your lighting) of Raisins

  • Extra Bread Flour (for rolling)


INSTRUCTIONS

Raisin Hokkaido Milk Bread - Tang Zhong Roux

Tang Zhong Roux

  1. In a non-stick pan, combine flour and water

  2. Over medium heat, stirring constantly, cook the mixture until it thickens until pudding-like

  3. Transfer to a bowl, cover with plastic wrap & cool at room temperature before use (or leave in fridge over night but use at room temperature when ready)


Milk Bread

  1. In a large bowl, mix flour and salt together

  2. Add Sugar, Active Dry Yeast and combine

  3. Add beated Egg, Lukewarm milk and start to combine with spatula

  4. Add Tang Zhong Roux and combine with a spatula until it becomes a very sticky dough

  5. Add cubed butter and combine

  6. Sprinkle your work surface with bread flour (at least 3 Tbsp) and start to knead the dough (It will be very sticky to start). You can also use a Standmixer if you have one to help with the stickiness and kneading

  7. Incorporate more flour if you need for kneading but don’t add too much - you’ll want your dough to be soft and slightly sticky

  8. Knead for about 15 minutes or until your dough is smooth and elastic

  9. Form dough into a ball, place in a greased bowl and cover with tea towel or plastic wrap

  10. Let it rise in a warm place until triple in size. Check to see if it’s ready by poking your dough. If it maintains its shape, then it’s ready!

    TIP: I have a PROOF setting on my oven (100°F) so I stuck it in there for about 45 minutes for proofing

Raisin Hokkaido Milk Bread

11. Transfer the dough onto a pastry mat or floured surface. Split dough into 3 equal pieces with dough cutter
12. Roll each piece into a ball and cover other 2 balls with a tea towel
13. Using a rolling pin, roll each ball into a long oval shape
14. Sprinkle some raisins (however much you want in your bread) overtop. Lightly press down into dough (not too hard)
15. Fold the bottom third of the oval over the middle, then fold the top third of the oval over that
16. Turn the folded dough 90° and roll out again into rectangular shape
17. Sprinkle more raisins overtop the dough, press lightly into dough
18. Use your hands to roll dough upwards into a log. Pinch ends to seal. Place rolled dough into a greased loaf pan
19. Repeat with remaining 2 dough balls
20. Cover your loaf pan with a tea towel (or plastic wrap) and proof for another 30 minutes. You’ll know it’s ready when the dough reaches the top of the pan\

Raisin Hokkaido Milk Bread
Raisin+Hokkaido+Milk+Bread
Raisin Hokkaido Milk Bread

21. Prehead oven to 350°F (175°C)
22. Brush the top with beaten egg and milk mixture
23. Bake for about 25 minutes
24. Let cool in pan for about 15 minutes before removing. Take it out of the pan and cool on wire rack after.
25. You can keep the bread fresh for about 1 week. Store in paper bag, or wrap in paper towel then into a plastic bag

Enjoy!


Please don’t forget to tag me! I would absolutely love to see your creations and how they turn out!



RECIPE: Easy PersiMons Burrata Salad by Jenn Chan

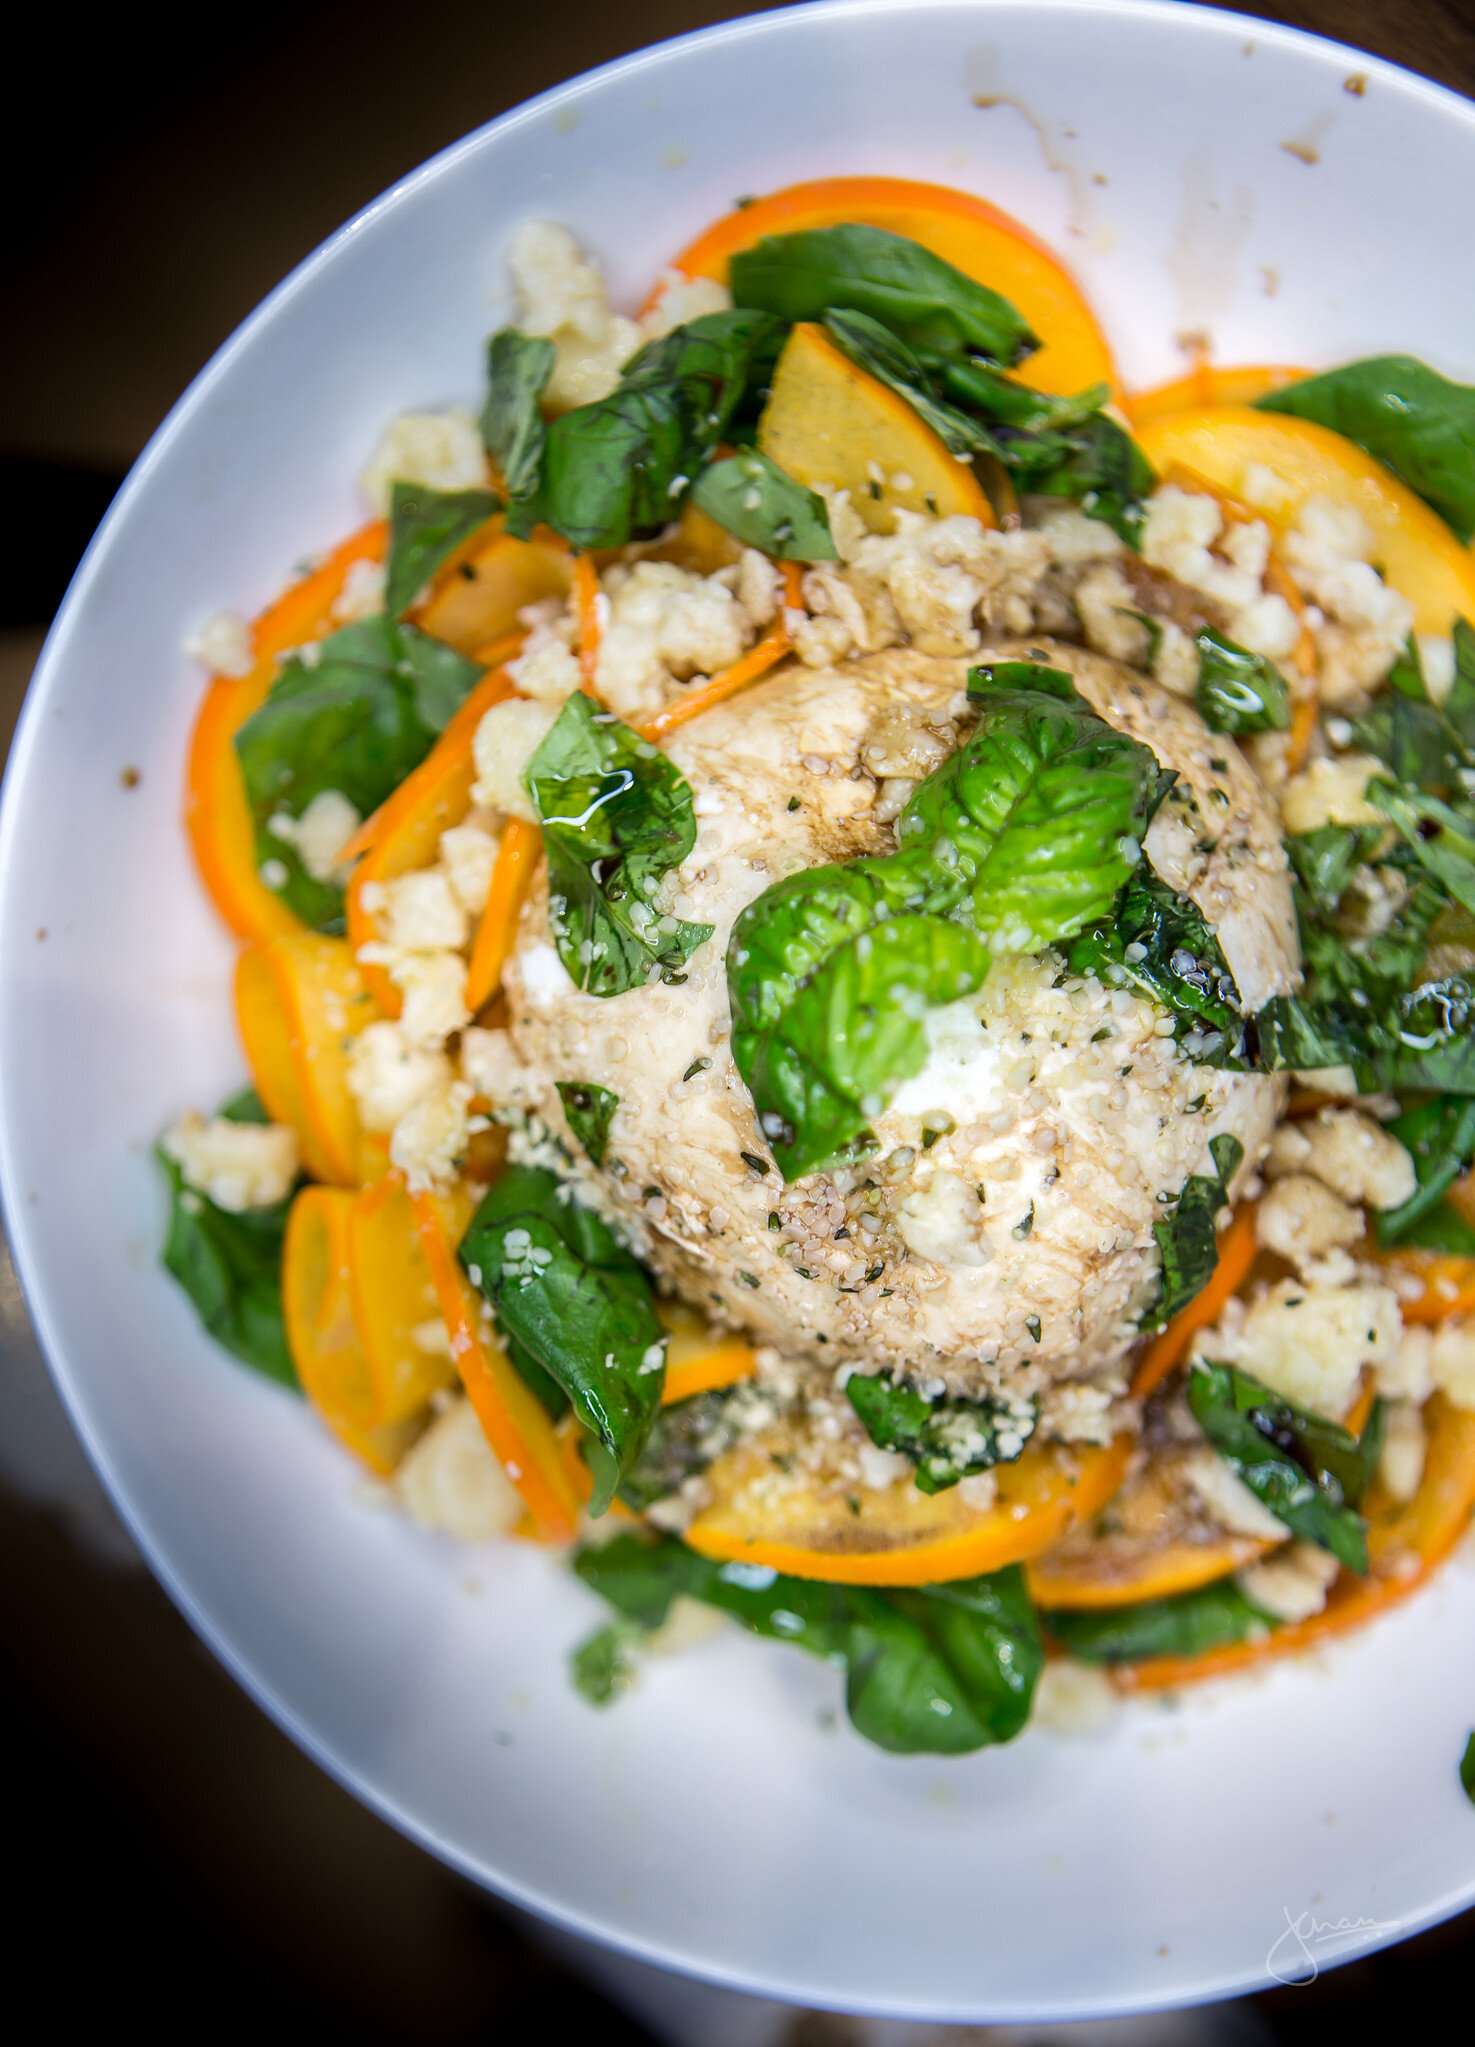
PersiMons Burrata Salad

I’m writing my first ever recipe, and I’m so happy I’m starting with this one since it’s SUPER easy, refreshing and delicious! I worked with the PersiMons - limited edition, exceptional, now-in-season and ready-to-eat persimmons. If you haven’t had a persimmon before, they’re firm, seedless, and has a peach/mango flavour. They are from the heart of the Ribena Del Xuquer Valley, naturally ripen and are in season from November to January. You can easily eat the PersiMon on it’s own like an apple (without the core), but here’s a simple recipe for something different!


Easy PersiMons Burrata Salad

Prep Time: 10 minutes
Servings: 2

Ingredients

PersiMons ingredients
  • 2 PersiMons

  • 1 Burrata

  • 1/4 cup Macadamia nuts (or any nut of your choice)

  • 1 TBSP hemp hearts

  • handful of basil leaves

  • Extra Virgin Olive Oil

  • Balsamic Vinegar


Instructions

  1. Wash and gather all your ingredients

  2. Pulse or roughly chop your Macadamia nuts

  3. Thinly slice PersiMons

  4. Time to assemble! Place burrata in the center

  5. Roll up or place PersiMons all around the burrata

  6. Sprinkle chopped Macadamia nuts all over salad

  7. Roughly rip basil leaves and place all throughout salad

  8. Drizzle extra virgin olive oil overtop salad

  9. Drizzle balsamic vinegar all over

  10. Sprinkle hemp hearts all over

  11. Enjoy!

PersiMon Burrata Salad

I’d love to see your creations with PersiMons! Please feel free to tag me!

REVIEW: OWC Mercury Elite Pro Dual with 3-port Hub by Jenn Chan

OWC Mercury Elite Pro Dual

I was recently gifted a 2TB OWC Mercury Elite Pro Dual with 3-port Hub to test out and I was ecstatic as I’m constantly looking for better ways to work on my photos and videos on my Macbook Pro. I have found it more reliable to work off of an external drive than on the laptop itself as it helps to run my applications more efficiently.

owc3.jpg
owc2.jpg

The capacity of the hard drives go from 2TB to a whopping 32TB (you’ll never run out of storage!!) with speeds up to 567MB/s1 (an entire DVD in less than 5 seconds or transfer 1,000 photos in 2 seconds). The hard drives are universally compatible and works with any USB-equipped Mac, PC, or mobile device such as iPad Pro, gaming consoles, and anything that supports external storage. However, I did realize that I’m not able to use the drive for both my Macbook Pro and my PC together.


What I found very useful, of course, are the 3 USB hub ports for audio or video mixers, cameras, card readers, tablets, keyboards, mice, etc. This is especially useful for the newer model Macbooks which for some reason don’t include any ports!! You’ll be able to connect or change with these ports as well. (Perfect for those times when you only have a phone charging cable with you!)

The only down side (if you can even consider it one) is the need to plug it in to power the hard drive for use. In my opinion, the PROs definitely outweigh it. I absolutely love the speed of transfers, which allows me to focus on editing the photos and videos instead of waiting for my files to load. I’m happy with how quiet it is, even when it’s running at full capacity when I am backing up my whole computer onto it. This is the perfect addition to my home office - cutting down my transfer times and knowing my precious files are safe!

Vancouver International Wine Festival 2020 by Jenn Chan

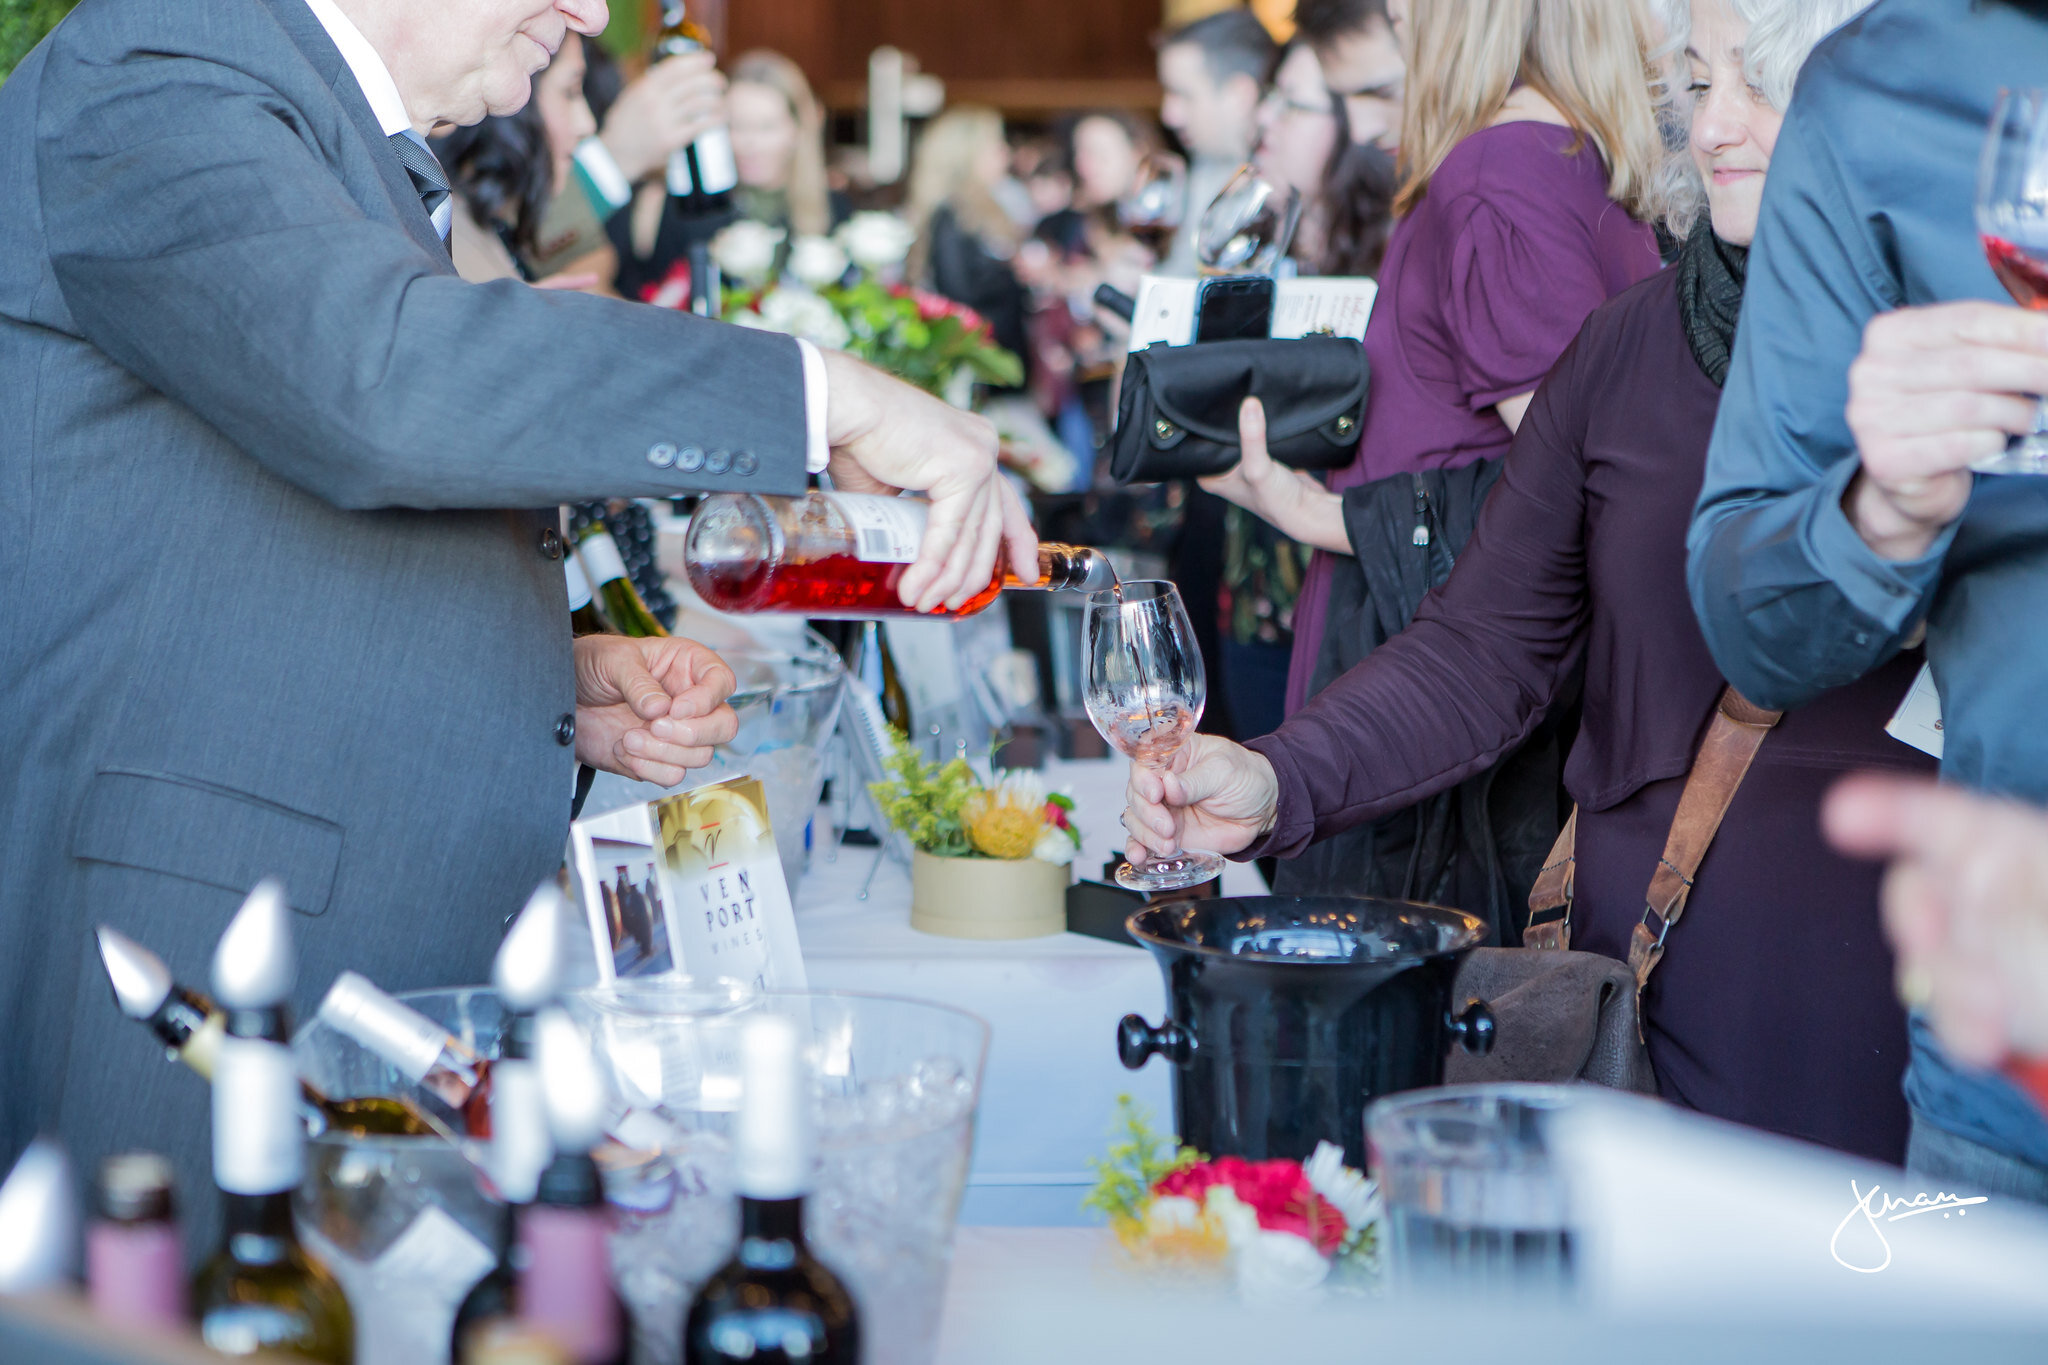
Vancouver International Wine Festival

It’s that time of year again - the Vancouver International Wine Festival will be here from February 22 - March 1, 2020. This is one of the most anticipated events of the year for me and for good reason. There are over 160 wineries featuring their top grapes and wines. It’s my time to explore new vineyards and flavours!

The 2020 festival runs February 22 to March 1 and welcomes 163 wineries from around the wine world. All participating wineries and their principals gather in the Tasting Room (February 27-29) to showcase their wines. This year, the festival’s theme is Vive la France!, with 42 wineries and their principals from France travelling to Vancouver to share wines from their storied terroirs. They’re joined by 121 wineries from 14 additional countries, plus wines from South Africa available only at a Regional Tasting Station in the Tasting Room. Overall, more than one out of five wineries are new to the 2020 festival. 


There are a few options for tickets: Delta Air Lines Tasting Lounge (Fridays & Saturdays), International Festival Tastings (Thursday to Saturday), and for the ultimate experience - The Gold Pass. The Gold Pass allows you to experience everything the festival has to offer with VIP treatment when you become a Gold Pass holder. A terrific value, this pass offers incomparable access to VanWineFest. A $768 value for only $519!

*** Did you know! You can score some free Wine Fest tickets? Find out how HERE !! If you’re wanting to sip on tons of wine and stay overnight in Vancouver, this is the deal for you!


For more information on Vancouver Wine Festival, CLICK HERE.

Hope to see you at the festival!

PRESS RELEASE | Starbucks introduces two NEW beverages to kick off 2020! by Jenn Chan

Starbucks customers have shared that when they come to Starbucks, they are looking for a variety of options to make the right choices for themselves. To help customers easily find what they’re looking for to meet their lifestyle and taste preferences, Starbucks is introducing two NEW non-dairy beverages made with plant-based milk alternatives, the Almondmilk Honey Flat White and the Coconutmilk Latte, on Tuesday, January 7th. 

The Almondmilk Honey Flat White combines ristretto shots of Starbucks Blonde Espresso with steamed almondmilk and a hint of honey, creating a delightful twist on a beloved espresso classic.

The Almondmilk Honey Flat White combines ristretto shots of Starbucks Blonde Espresso with steamed almondmilk and a hint of honey, creating a delightful twist on a beloved espresso classic.

The Coconutmilk Latte combines shots of Starbucks Blonde Espresso with steamed Coconutmilk. A strike of Cascara sugar topping adds subtle notes of dark brown sugar and luscious maple after every sip.

The Coconutmilk Latte combines shots of Starbucks Blonde Espresso with steamed Coconutmilk. A strike of Cascara sugar topping adds subtle notes of dark brown sugar and luscious maple after every sip.

Here’s what you need to know:  

  • NEW non-dairy options! More and more, customer desire is increasing for non-dairy options and Starbucks is meeting that demand. 

  • Both new beverages are made with Starbucks Blonde® Espresso and will be joining the permanent menu at participating Starbucks Canada locations. 

  • To meet dietary needs, Starbucks recommends all customers start by checking the ingredients on Starbucks.com. Below are some tips on how to create your perfect Starbucks order:  

    • Select a non-dairy milk: Order your beverage with soy beverage, almond beverage or coconut milk beverage

    • Select a flavoured syrup: The following syrups do not contain animal-derived ingredients: Vanilla, Caramel, Hazelnut 

    • Hold the following ingredients, which contain dairy: Whipped cream, java chips, protein powder, caramel sauce (Pro tip! Caramel sauce is different from caramel syrup) 

  • Avoid beverages made with: Pumpkin Spice Sauce, White Mocha Sauce and Caramel Brulée Sauce 


LUZIA by Cirque du Soleil | “A Waking Dream of Mexico” by Jenn Chan

Photo credit : Matt Beard / Costumes: Giovanna Buzzi / 2016 Cirque du Soleil

Photo credit : Matt Beard / Costumes: Giovanna Buzzi / 2016 Cirque du Soleil

When I heard that Cirque du Soleil is coming back to Vancouver for another show this year, I was excited! I always love their show and have made it a point to go see them when they came to Vancouver (since I don’t head off to Vegas often). I’ve always been impressed with the choreography, performance and set designs. Not to mention all the performers’ stamina!! After watching any cirque show, I always tell myself I need to start going to the gym (and somehow never happens …)

A few of my friends had seen the show already this year (their first show was October 3, 2019) and have raved about Luzia! I had to see it for myself, and WOW was it a great show! Every cirque show has its own theme, and LUZIA’s theme is “A Waking Dream of Mexico”. To quote their site, “LUZIA takes you to an imaginary Mexico, like in a waking dream, where light (“luz” in Spanish) quenches the spirit and rain (“lluvia”) soothes the soul. With a surrealistic series of grand visual surprises and breathtaking acrobatic performances, LUZIA cleverly brings to the stage multiple places, faces and sounds of Mexico taken from both tradition and modernity.” They did not disappoint.


LUZIA is a whimsical show with many comical moments. I found myself amazed by the show (of course) but also how seamlessly they were able to transform the stage from act to act - a lot of times without me realizing until the set has already completely changed! The very first set had a large treadmill taking over the whole stage and miraculously, somehow, it was gone! Magic! I found myself trying to keep an eye on the “background set staff” to see if I can spot them changing the sets for the rest of the show, but there were always so much going on to distract you that I could almost never spot them changing up major set pieces.

Photo credit : Matt Beard / Costumes: Giovanna Buzzi / 2016 Cirque du Soleil

Photo credit : Matt Beard / Costumes: Giovanna Buzzi / 2016 Cirque du Soleil

Photo credit : Matt Beard / Costumes: Giovanna Buzzi / 2016 Cirque du Soleil

Photo credit : Matt Beard / Costumes: Giovanna Buzzi / 2016 Cirque du Soleil

Photo credit : Matt Beard / Costumes: Giovanna Buzzi / 2016 Cirque du Soleil

Photo credit : Matt Beard / Costumes: Giovanna Buzzi / 2016 Cirque du Soleil

Photo credit : Matt Beard / Costumes: Giovanna Buzzi / 2016 Cirque du Soleil

Photo credit : Matt Beard / Costumes: Giovanna Buzzi / 2016 Cirque du Soleil

LUZIA is a very well put together show and you can see just how much preparation it took to put on the performance. There are so many elements and moving parts in the show that I feel like I will find something new in the show every time I rewatch the show! The most notable difference to me, from all the other Cirque shows i had seen in the past, is the water element. I have always wanted to go to Vegas to watch “O” but it has never happened so I was happy to see LUZIA incorporating water into their show. It just added an extra WOW factor to the show, that you don’t often see in other traveling shows. Unfortunately, I think we did not get to watch the “jungle man act” (last photo in this post), but it looks like it would’ve been amazing.

Photo credit : Matt Beard / Costumes: Giovanna Buzzi / 2016 Cirque du Soleil

Photo credit : Matt Beard / Costumes: Giovanna Buzzi / 2016 Cirque du Soleil

Photo credit : Matt Beard / Costumes: Giovanna Buzzi / 2016 Cirque du Soleil

Photo credit : Matt Beard / Costumes: Giovanna Buzzi / 2016 Cirque du Soleil

If you haven’t seen LUZIA by Cirque Du Soleil yet, I highly recommend you go check it out! They will be in Vancouver until December 29, 2019. HINT HINT: Christmas is coming and a pair of tickets will make a great gift! ;)

Now… it’s time for me to hit the gym….. (maybe).

Photo credit : Matt Beard / Costumes: Giovanna Buzzi / 2016 Cirque du Soleil

Photo credit : Matt Beard / Costumes: Giovanna Buzzi / 2016 Cirque du Soleil